
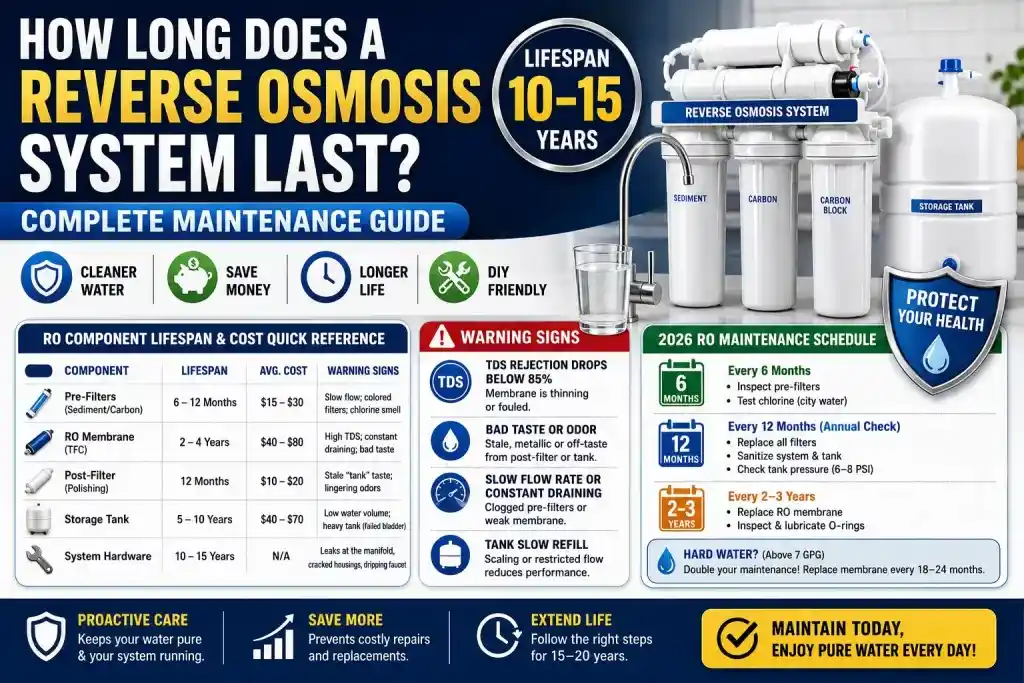
A well-maintained reverse osmosis system’s lifespan typically ranges from 10 to 15 years. But one must distinguish the permanent hardware of the system, manifold, housings, and faucet from the consumables that make it run. The “bones” of the unit are very tough, but the filters and membranes are the real wear parts of the system and must be replaced on a regular basis to prevent total system failure.
You will find the RO system component lifespan for each stage of your reverse osmosis system maintenance guide. We will detail the exact RO maintenance schedule needed to reach that 15-year milestone, the “silent warning signs” of a failing membrane, and the cost/lifespan analysis of annual upkeep.
RO Maintenance & Replacement Quick-Reference
| Component | Replacement Interval | Warning Signs |
|---|---|---|
| Pre-Filters (Sediment/Carbon) | 6-12 Months | Slow flow; colored filters; chlorine smell |
| RO Membrane (TFC) | 2-4 Years | High TDS; constant draining; bad taste |
| Post-Filter (Polishing) | 12 Months | Stale "tank" taste; lingering odors |
| Storage Tank | 5-10 Years | Low water volume; heavy tank (failed bladder) |
| System Hardware | 10-15 Years | Leaks at the manifold, cracked housings, dripping faucet |
What Is the Lifespan of Each Component in an RO System?
You must maintain a high-performance reverse osmosis system as a set of individual parts with different expiration dates. How long the reverse osmosis component lives depends on how much work each stage does; For example, pre-filters “punish” themselves to make the expensive RO membrane work at its fullest potential.
RO Component Lifespan & Cost Breakdown
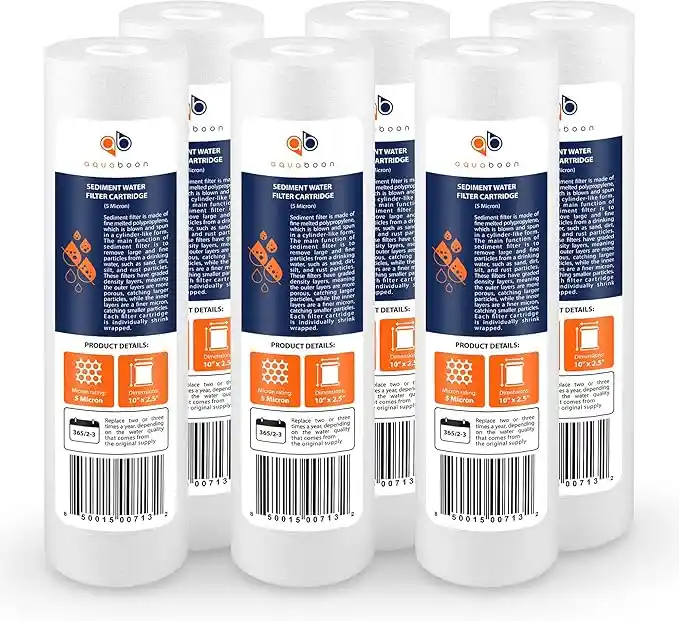
- Sediment Pre-Filter (5 Micron)
- Lifespan: 6-12 months
- Typical Cost: $10-$15
- Practical Note: This is your first defense. In homes with “well water” or old copper pipes, this can take 3 months to clog. Check this filter first if your water flow becomes a trickle.
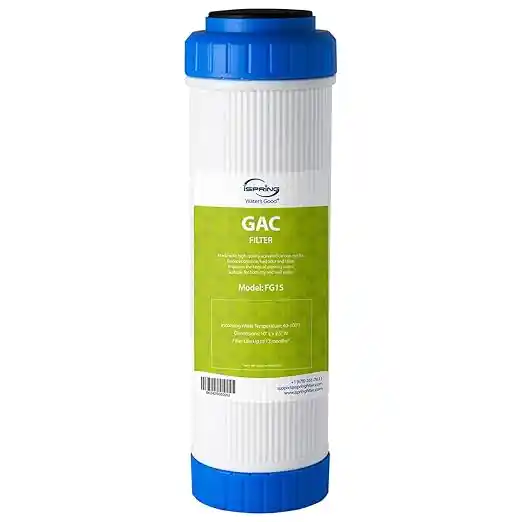
- Carbon Pre-Filter (GAC or Block)
- Lifespan: 6-12 months
- Typical Cost: $15-$25
- Practical Note: Carbon filters have a chlorine removal capacity. After exhaustion, chlorine reaches the RO membrane and permanently thins the material, producing a “leaky” membrane that fails to reject dissolved solids.
- RO Membrane (TFC)
- Lifespan: 2-4 years
- Typical Cost: $45-$85
- Practical Note: The residential RO membrane lifespan benchmark is 24-36 months. If your tap water TDS is over 500 ppm or your water is very hard, however, the membrane may need replacement every 2 years to maintain a 90% + rejection rate.

- Post-Carbon Polishing Filter
- Lifespan: 12 months
- Typical Cost: $12-$20
- Practical Note: This filter gets rid of the ‘stale’ taste from the air bladder of an RO storage tank. Even if you use little water, the calendar is important here; stable water in a carbon filter may develop an odor.

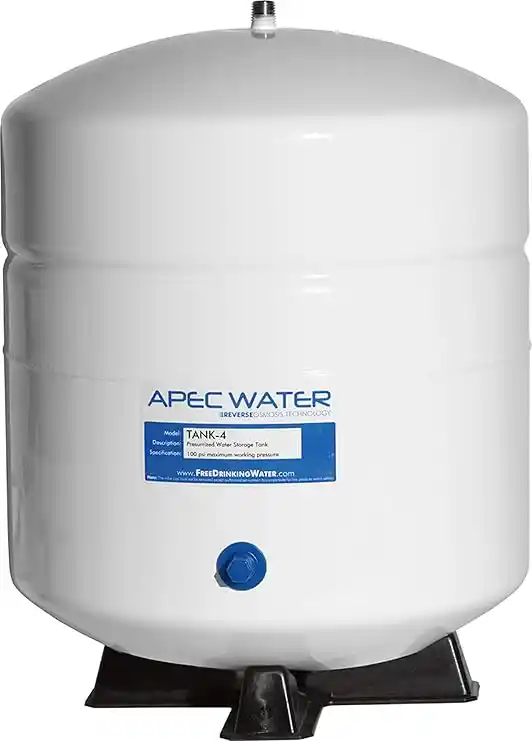
- RO Storage Tank
- Lifespan: 5-10 years
- Typical Cost: $45-$75
- Practical Note: The internal air pressure in tanks is lost, or the rubber bladder bursts eventually. Should a tank feel heavy but give only a few cups of water before the flow stops, the internal bladder has failed, and the tank must be replaced.
What Are the Warning Signs That Your RO Filters or Membranes Need Replacing?
While a calendar is a helpful guide, your water quality and usage habits may necessitate maintenance sooner than expected. Learning to diagnose the RO filter warning signs can save you from drinking contaminated water or wasting hundreds of gallons of “brine” due to a system malfunction.
Sign 1: The TDS Rejection Rate Drops Below 85%
The most objective way to do TDS meters RO membrane checks is to compare tap water to RO water. With a 300 ppm tap at 60 ppm RO, your rejection rate is now 80%. When the RO rejection rate is below 85%, the membrane has probably “thinned” or fouled and can no longer block molecular contaminants.
Sign 2: RO Water Tastes Bad or “Metallic”
When your RO water tastes bad, do not immediately blame the membrane. A RO water off-tasting reason is usually a saturated post-carbon polishing filter or a soiled storage tank. When water tastes fine at first but turns “stale” after sitting, it may be the tank or post-filter causing the problem. Immediately, it tastes metallic; the membrane is probably exhausted.
Sign 3: Slow Flow Rate or Constant Draining
A clogged sediment pre-filter is usually the cause of an RO slow flow rate. But with the RO system running continuously (you hear water pouring down the drain for hours), the membrane may be so blocked that it no longer produces enough pressure to open the automatic shut-off valve.
Sign 4: RO Tank Slow Refill
If it takes longer than 4 hours to fill a standard 3-gallon tank, your membrane is “scaling” because of hard water. Test your pre-filters before replacing them: restricted flow to the membrane will mimic a failing membrane.
How Often Should a Reverse Osmosis System Be Serviced?
A standard residential reverse osmosis system should be serviced at least once every 12 months for sanitization and filter replacement. However, the sediment and carbon pre-filters may require service every 6 months if you live in an area with high sediment or heavy chlorine. Neglecting this schedule doesn’t just affect taste; it leads to permanent membrane damage.
The 2026 RO Service Checklist
To reach the 15-year lifespan benchmark, follow this tiered RO maintenance schedule:
Every 6 Months
- Inspect Pre-filters: Visually check the sediment filter for dark discoloration.
- Test Chlorine: If you are on city water, use a simple test strip to ensure your carbon stage is still blocking chlorine before it reaches the membrane.
Every 12 Months (The “Annual Check”)
- Replace All Filters: Swap out the sediment, carbon pre-filters, and the post-carbon polishing filter.
- Sanitize the System: Use a manufacturer-approved sanitizing solution to flush the housings and storage tank to prevent biofilm buildup.
- RO Tank Pressure Check: Use a low-pressure gauge to ensure the empty tank’s air bladder is at 6-8 PSI.
Every 2-3 Years
- Replace the RO membrane: Even if it “seems fine,” the material eventually loses its rejection efficiency.
- O-Ring Inspection: Lubricate or replace the rubber O-rings in the filter housings to prevent under-sink leaks.
The “Hard Water” Exception:
Unless you have a whole-home softener and your water hardness is greater than 7 GPG, your RO system service frequency must double. The minerals will scale the membrane much more quickly and will require a membrane replacement once every 18-24 months instead of 3 years.
What Is the Full RO Maintenance Checklist-and Can You Do It Yourself?
It is very easy to maintain your RO system; it takes about 45 minutes with just a reverse osmosis filter wrench, a towel, and a small bucket for the average homeowner. In fact, DIY RO system maintenance is your best bet to never have your water quality drop.
The step-by-step RO system annual service is
- System Shutdown & Pressure Release
The cold water supply valve and storage tank valve should be closed. Open the RO faucet to drain remaining water & release internal pressure.
- Filter Removal
Unscrew the housings with a filter wrench. Keep a towel under because the housing will be flooded. Old sediment and carbon filters are removed.
- RO Housing Cleaning Procedure
Wash empty housings with warm, soapy water. Check the rubber RO O-ring for cracks; Put on a thin coat of food-grade silicone lubrication over the O-ring to avoid further leaks.
- RO System Sanitization
Prevent bacterial biofilm with a bleach flush. 2-3 tablespoons of unscented household bleach should be added to the first housing/sediment prior to installing new filters, and let the system run one full tank cycle (do not drink this water).
- Filter Installation
Install new filters in their housings. Hand-tighten the housings; over-tightening with a wrench may crack the manifold or bind the O-ring.
- RO Tank Pressure Check
Place a Schrader valve on the storage tank, like a tire valve, and open it. Check your low-pressure gauge to see if it reads 6-8 PSI empty.
- Flush and Test
Restart the water and fill the system. The first two full tanks of water should be sanitized and carbon fines removed by flushing with water. Finally, do a TDS to confirm that your new filters are operating at peak efficiency.
What Factors Most Affect How Long an RO System Lasts?
A reverse osmosis system rarely “dies” all at once; instead, its lifespan is a reflection of how well its core components are protected from environmental stress. Understanding the specific variables that cause RO systems to fail early will help you reach that 15-year target.
The 5 key lifespan factors are
- Water Hardness (Above 7 GPG)
The major cause of RO membrane scale fouling is high levels of calcium and magnesium. If your water is “hard,” these minerals actually crystallize onto the membrane surface and block the microscopic pores. Without a water softener, hard water can reduce a 4-year membrane life to 18 months.
- Chlorine Exposure (The “Chemical Burn”)
TFC membranes are reactive to oxidants. In 200 to 1,000 operating hours, even 1 ppm of residual chlorine can irreversibly damage the RO membrane. Hence, replacing your carbon pre-filters on time is the most important step to extend RO lifespan.
- Feed Water Pressure (Below 40 PSI or Above 80 PSI)
Under or Over 80 PSI: Low pressure makes the system work harder to fill the tank, causing longer contact time between contaminants and the membrane. In the opposite direction, pressure increases above 80 PSI may stress plastic housings & O-rings and cause structural cracks and under-sink leaks.
- Usage Volume (Gallons Per Day)
Residential systems are durable but have finite “throughput.” A family of six using the RO system for drinking, cooking, and the ice maker will use up the RO system twice as quickly as a single-person household.
- Maintenance Compliance
The “set it and forget it” approach is the primary reason systems fail early. RO maintenance compliance lifespan studies show that annual sanitization prevents biofilm growth, which can otherwise “slime” the membrane and foul the storage tank beyond repair.
How Do You Extend the Life of Your RO System to 15-20 Years?
While the average system lasts a decade, reaching the 15–20 year milestone is entirely possible with a shift from “reactive” to “proactive” maintenance. A neglected system often dies due to a ruptured tank bladder or a cracked manifold, but a well-cared-for unit can serve a household for a generation.
The 5 strategies for long-term system longevity are:
- Install a “Pre-Protector” (Whole House Sediment Filter)
On a private well or near a water main break, the standard 5-micron RO sediment filter can get overwhelmed. Installing a 20 mm whole-house pre-filter is like having a bodyguard for the bodyguard; your RO system’s internal stages are protected from heavy grit and sand.
- The “Full Drain” Bi-Weekly Habit
Most users draw just a few glasses at a time, so the water at the bottom remains stagnant for months. Every two weeks, draining the storage tank completely forces the system to make a new batch of water to prevent TDS creep and keep the internal rubber bladder flexible.
- Perform a Monthly TDS “Health Check”
Don’t wait for a bad taste before you act. Test your water using a handheld TDS meter the first of every month. Increasing ppm gradually over three months is an “early warning” that your membrane is fouling, and you can replace it before it lets lead or arsenic into your glass.
- Use Brand-Matched, NSF-Certified Filters
Generic “one size fits all” filters may have small dimensional differences that bypass the internal seals on your RO housing. Always use NSF-certified RO replacement filters that are brand-matched to your unit (e.g., APEC filters for APEC systems) for a perfect 0-micron seal and to prevent internal “leak-around.”
- Sanitize During Every Filter Change
Every time you open the housing for switching filters, you release air and potential bacteria. Adding a dedicated RO sanitization kit or unscented bleach at the annual filter swap prevents biofilm from “sliming” the internal manifold, the #1 cause of permanent “swimming pool” odors in older systems.
When Is It Time to Replace Your Entire RO System-Not Just the Filters?
While a quality reverse osmosis system can serve your home for 10 to 15 years, there comes a point where “one more repair” is no longer the most cost-effective path. At the 12th year, internal parts like fittings, tubing, and manifolds develop microscopic stress cracks that cause catastrophic under-sink leaks.
The “replace vs. repair” decision matrix is
- The 50% Rule (Economic End-of-Life)
If your system is more than 10 years old and needs a major component replacement (such as a storage tank and a high-flow membrane) that costs more than 50% of the cost of a new 2026 model, replace it. Often, modern systems under $250 perform better than older, repaired $500 units.
- Persistent Odor or Biofilm
If your water still smells “off” after a filter change and system sanitization, embedded biofilm is likely in the manifold or a corroded storage tank bladder. If bacteria colonies form in plastic housing threads, a full system replacement is required for biological safety.
- Frequent Fitting Failures
If you are replacing O-rings & plastic “quick-connect” fittings every couple of months, the manifold’s structural integrity is failing. A decade of pressure cycles makes plastic brittle; one hairline crack can break your kitchen cabinets.
- Desire for 2026 Tech (The Upgrade Path)
Older “staged” systems are often water-inefficient (5:1 waste ratio) and bulky. If you want to reclaim your cabinet space or lower your water bill, upgrading to a tankless RO system with a 1:1 waste ratio and 600 GPD flow is a functional leap that maintenance alone cannot provide.
How Do You Use a TDS Meter to Test RO Membrane Performance?
Using a TDS meter or RO test is the only objective way to verify your system is actually purifying your water. First, collect a sample of your raw tap water and record the TDS (Total Dissolved Solids) reading. Next, let your RO faucet run for 30 seconds and collect a sample of the purified water. To find your RO membrane rejection rate, use this TDS rejection formula:
Rejection Rate % = (Total Parts Scrapped / Total Parts Produced) × 100
An ideal membrane rejection rate is 90% to 98%. If the rejection rate of your RO water TDS measurement is below 85% (tap water 200 ppm/RO water 40 ppm), your membrane is at the end of life, and replacement is required.
How Do You Properly Sanitize an RO System and Storage Tank?
Once a year, RO system sanitization is recommended, usually during a filter change, to prevent RO bacteria in the prevention tank. Remove old filters and membrane and pour 2-3 tablespoons of unscented liquid bleach RO sanitizing solution (or a dedicated Sani-System packet) into the first filter housing. Assemble empty housings, turn on the water, and let the reverse osmosis tank cleaning process fill the storage tank. Ladle it out for 30-60 minutes, then flush the entire system twice through the RO faucet until the tank is empty. Use very high concentrations of hydroperoxide rot tank cleaners only if the manufacturer recommends it, as these can damage some plastic components.
How Does Hard Water Affect Your RO Maintenance Schedule?
Hard water is defined as anything over 7 GPG. Hard water RO filter thresholds increase RO membrane scaling. In these conditions, calcium and magnesium minerals physically “plate” onto the membrane surface, causing mineral scale RO membrane buildup that restricts water flow and lowers purity. If you have hard water, your RO hard water pre-filter schedule should shift from every 12 months to every 6 months to protect the system. The most effective water softener before an RO solution is to install a dedicated softener, which swaps these scaling minerals for sodium, allowing your RO membrane to last its full 3–4-year lifespan instead of failing in 12 months.
What Is the Difference Between Residential and Whole-House RO Maintenance?
The primary difference lies in the whole-house RO maintenance scale and the size of the components. While an under-sink unit uses 10-inch filters, a whole-house RO filter interval usually involves big blue RO 20-inch filter cartridges that handle thousands of gallons per day. Because whole-house systems protect every tap in the home, the whole-house RO inspection schedule is more rigorous, requiring monthly pressure gauge checks and frequent anti-scale chemical refills. In a residential vs. whole-house RO comparison, the under-sink unit is a “set and forget” appliance for 6 months, whereas commercial RO maintenance guide standards suggest whole-house systems need professional oversight to manage high-volume wastewater and pump health.
What Happens If You Don’t Replace RO Filters on Schedule?
Neglecting the filters sets off an RO filter failure cascade that destroys the entire unit. A saturated carbon filter will first let chlorine pass through, causing permanent RO membrane chlorine damage by thinning the TFC material. That puts you at risk for the RO filter not being changed, a risk where heavy metals and chemicals enter your drinking water. The result of RO filter neglect results in thick RO biofilm bacteria tank buildup that causes “rotten egg” odors over time. Leaving off a $20 filter today may mean a $100 + repair bill for a ruined membrane and a fouled storage tank later.
How Do You Know If Your RO Storage Tank Needs Replacement?
If your system makes a couple of cups of water a minute before the flow becomes a trickle, but the tank feels full and heavy, you have an RO tank bladder failure. This indicates that the internal rubber bladder has ripped or lost its “charge.” Find the RO tank pressure Schrader valve and depress the center pin to diagnose. If water sprays out the air valve, the bladder is dead & you need a new RO storage tank installed. No water comes out; reset the RO tank air pressure to 6 8 psi with a bicycle pump when the tank is empty. Once that pressure is lost for more than a few days, the RO tank not holding pressure is a slow leak, and a new tank is needed.

