
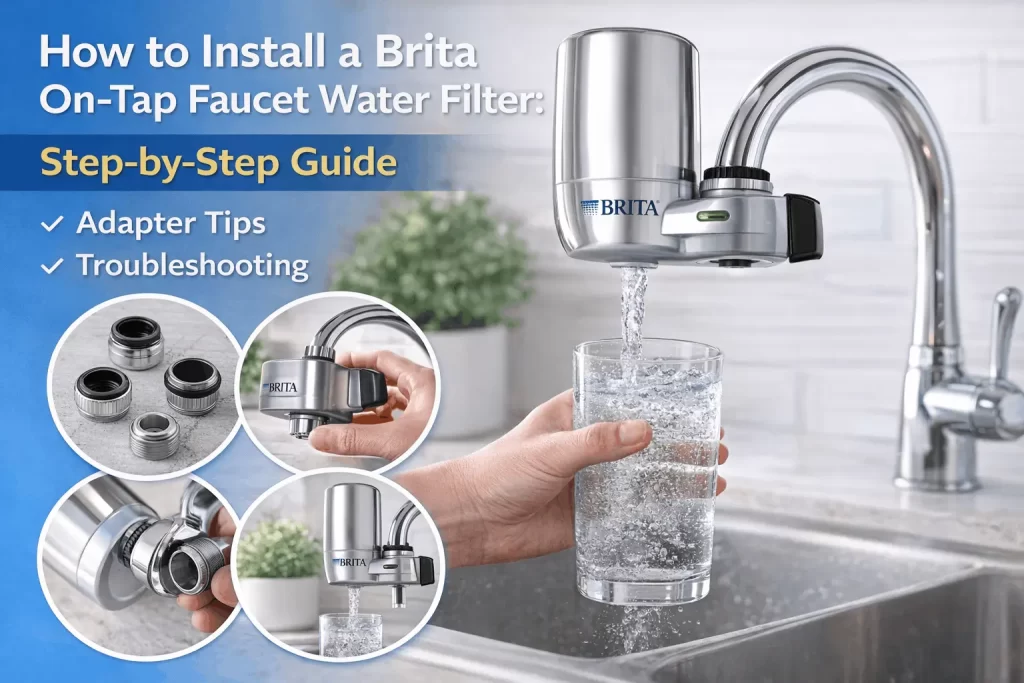
According to Brita’s technical specifications, installing a Brita On-Tap Faucet Water Filter requires 3 phases: adapter matching, mechanical connection, and electronic indicator activation. The system fits 95% of standard faucets but requires internal or external thread compatibility to prevent leaks.
Identifying the correct adapter selection involves removing the existing aerator from the faucet to reveal the thread type. Standard faucets feature either internal threads (located inside the faucet head) or external threads (visible on the outside). To ensure a pressurized seal, use an internal thread adapter for external threads and an external thread adapter for internal threads. Most U.S. faucets utilize a 15/16-inch or 55/64-inch diameter, which Brita accommodates with color-coded adapters labeled A, B, C, or D for brands like Moen, Kohler, or Delta.
To install your Brita On-Tap filter without tools, follow these four sequential steps to ensure a secure fit without damaging the plastic threading:
- Remove Original Hardware: Take off the old faucet aerator and all existing washers from the spout to ensure a clean connection point.
- Attach the Adapter: Screw your chosen Brita adapter by hand onto the faucet head until it is finger-tight.
- Align the Base: Slide the mounting base of the Brita unit over the adapter to engage the internal locking mechanism.
- Secure the Unit: Turn the mounting nut upward toward the faucet until the unit is firm and does not rotate during water activation.
Activating the Brita On-Tap filter indicator completes the setup. Hold the filter reset button for 5 seconds; release when the green light flashes to restart the 100-gallon timer.
Troubleshooting the system requires finding specific mechanical failures. The 4 common post-installation failures and fixes are:
- Leak from top: Reseat the rubber washer inside the adapter.
- Low water flow: Rinse the stainless steel mesh screen to clear sediment.
- Indicator light not flashing: Replace the CR2032 battery in the side compartment.
- Water spraying: Check that the adapter is flush against the faucet head
A standard Brita faucet filter kit contains all components needed for a 5-minute installation, Brita says in its standard packaging and technical specifications. Most setups use no tools because the system is intended for manual tightening of the plastic threads of the mounting collar and the filter cartridge.
What Do You Need Before You Start Installing the Brita Faucet Water Filter?
This filter does not fit a pull-out faucet, spray faucet, or sensor-style faucet.
What is in the box?
According to Brita’s standard packaging specifications, the faucet filter kit contains 5 components for tool-free installation on a standard faucet. The following table defines the specific components and their technical roles in maintaining a pressurized, leak-proof seal.
| Component | Purpose and Specification |
| Filter Base | The main housing has a built-in electronic filter indicator. |
| Filter Cartridge | One replaceable unit (Model FR-200) that filters 100 gallons. |
| Mounting Collar | The threaded ring that secures the base to the faucet adapter. |
| 2 Adapters | One internal adapter and one external adapter are needed to match the thread types. |
| Rubber Washers | Two gaskets are used to create a pressurized, leak-proof seal. |
Tools Needed for Installation
While Brita systems are designed for tool-free assembly, you may need basic household items for the initial removal of your existing hardware.
- None (Manual)
Perform all assembly steps by hand-tightening to avoid cracking plastic threads.
- Pliers
Use only to loosen a stuck or mineral-encrusted faucet aerator from the original spout.
- Cloth
Place a cloth between the pliers and the faucet to prevent scratching the chrome finish.
- Small Pin or Paperclip
Use it to press the reset button if the electronic indicator requires a deep-set trigger.
Brita Faucet Filter Compatibility Check
Checking if the Brita faucet filter is compatible is the most critical pre-installation step to avoid hardware damage. The system specifically matches a standard faucet that features a removable faucet aerator. If the faucet head can be unscrewed to reveal threads, it is compatible with the provided adapter sets.
| Images | Faucet Type | Compatibility Status | Requirement | Price |
|---|---|---|---|---|
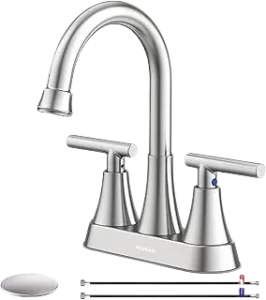 | Standard Faucet | Compatible | Requires a removable aerator with internal or external threads. | Check Price |
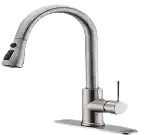 | Pull-out Faucet | Incompatible | Flexible hoses and spray heads do not support the weight of the base. | Check Price |
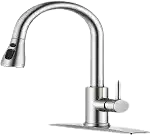 | Spray Faucet | Incompatible | Integrated spray patterns prevent a pressurized seal with the adapter. | Check Price |
 | Sensor Faucet | Incompatible | Motion-activated systems often lack the necessary threading. | Check Price |
Step 1: Remove the Aerator from Your Faucet
The Brita faucet filter’s first step involves preparing your sink spout by detaching the existing hardware. A faucet aerator is the small, mesh-lined component at the very faucet tip that regulates water pressure and prevents splashing. To remove faucet aerator components, you must make space for the new Brita adapter.
To unscrew the aerator housing, grip the metal ring at the end of the spout and turn it clockwise when looking up from the sink basin. Turn the aerator housing clockwise from below to unscrew it. This direction reverses because the view is bottom-up. Clean the faucet threads of calcium deposits and grit with a damp cloth before attaching the Brita adapter.
Avoid using pliers to unscrew aerator parts if possible, as the serrated metal teeth easily scratch a polished chrome finish. If the piece is stuck due to mineral buildup, wrap a cloth around the housing before gently applying pressure with a wrench. Once the aerator is off, use a damp cloth to clean the faucet threads of any white calcium deposits or grit to ensure a smooth connection for the Brita unit.
Finally, examine inside the faucet tip for any hidden rubber washers or plastic gaskets left behind from the old aerator. You must remove all original seals because leaving an old washer in place prevents the Brita adapter from seating flush against the spout. A clean, empty threaded spout is required before moving to the adapter selection phase.
Step 2: Choose the Right Adapter for Your Faucet
Determining which adapter to use is the most critical phase of the installation because the connection type dictates whether you need a Brita faucet adapter at all. After you remove the faucet aerator components, examine the faucet tip to identify your specific faucet thread type. Most household sinks feature either external threads (male) or internal threads (female), and the installation process differs significantly between the two.
How to Identify Your Faucet Thread Type?
To identify your threading, look at the end of the spout where the aerator was attached. If the male faucet threads are located on the outside of the faucet tip, your faucet is externally threaded. In most cases, a standard faucet with external threads does not require a Brita faucet adapter because the mounting collar on the Brita base is designed to screw directly onto these threads.
If the threads are hidden inside the faucet tip, you have female threads. This configuration requires one of the included chrome or plastic adapters to bridge the connection between the internal spout and the filter base. Using a Brita filter adapter guide helps ensure you do not strip the delicate threads during this transition.
Testing and Attaching the Adapter
To install the adapter, first place the correct rubber washer into the recessed end of the adapter to ensure a pressurized seal. Align the adapter with the internal threads of the faucet and begin to hand-tighten only. Do not use a wrench or pliers, as high torque can crack the adapter or damage the faucet’s finish. If the first adapter does not feel snug or encounters immediate resistance, stop and try the second included option.
If you find it difficult to get a firm grip with your fingers, look for the small notch at the bottom of the Brita faucet adapter. You can insert a coin into this notch to provide extra leverage for the final quarter-turn. If you experience an adapter not fitting scenario where neither provided part matches your spout, you likely have a non-standard or “junior” size faucet. In this instance, contact Brita support at 1-800-24-BRITA to request a specialized attachment for your specific brand.
Step 3: Attach the Filter Base to Your Faucet
To attach the Brita filter base components correctly, hold the main unit so the filter cartridge cup faces the left side of the faucet. This particular Brita filter orientation leaves the water diversion lever accessible to the right for easy switching between filtered and unfiltered streams. Align the mounting collar with the faucet threads or the pre-installed Brita faucet adapter threads, and screw the Brita filter housing downwards. Then manually tighten the collar until the unit holds its shape and the faucet filter wobbles no more. No pliers or wrench should be used during this step, as overtightening causes cracked plastic collars and associated leakage.
Step 4: Insert the Filter Cartridge
To insert the Brita filter cartridge components correctly, you must achieve a precise mechanical seal between the cartridge and the base. Begin by supporting the filter base from below with one hand for stability. On the other hand, to insert Brita filter units holding the replacement filter cartridge and lining up pegs on the bottom of the unit with two holes in the filter cup, you will hold the replacement filter cartridge and then place pegs in the appropriate positions inside the filter cup.
Push the cartridge straight down into the housing without rotating or twisting the plastic. Press till you hear a click; this is the primary acoustic signal that the internal locking mechanism has engaged. That clicking sound means that the filter cartridge is locked in place and is ready to receive pressurized water.
If the filter does not click, the cartridge will not be seated correctly, and the bypass valve will fail completely. It is this misalignment that causes the Brita filter to leak from the side during filtration. Remove the cartridge if no click is heard, verify the internal guide rail alignment, and apply downward pressure again until the unit is recessed and immobile.
Step 5: Flush the New Filter for 5 Minutes before First Use
To finalize the Brita filter’s first use, you must perform a comprehensive 5-minute flush to prepare the internal media for safe consumption. This process is called filter conditioning because the activated carbon in the filter cartridge contains carbon dust from manufacturing and shipping. For a flush of Brita faucet filter components, turn on your sink and switch the diversion handle to Brita filtered water.
The first 60 seconds of this process will normally see black water from the Brita filter discharge. This grey-to-dark discoloration is harmless carbon dust washed out of the system and not indicative of a failed unit or water quality. Keep running water until the stream is completely clear, about five minutes after starting a cycle, usually.
For that first flush & all subsequent uses, use cold water through the filtration bypass. Running a hot water Brita filter stream over 100°F (38°C) will physically damage the internal filtration membrane and shorten the 100-gallon filter life. Your system is calibrated after the first 5-minute flush. For daily operation, run 5 seconds of water before filling your glass with the media, or 30 seconds if the device has been unplugged for more than two days.
Understanding the Brita Filter Indicator Lights After Installation
The Brita filter indicator light system provides real-time feedback on the remaining lifespan of your filter cartridge based on a 100-gallon (360-litre) capacity. This Brita filter replacement indicator is integrated into the filter base and activates automatically whenever you engage the diversion lever for the Brita filtered water setting. Monitoring these signals prevents the consumption of unfiltered water once the carbon media reaches its saturation point.
Brita Filter Indicator Light States
The system uses three distinct color codes to communicate the current status of your filtration hardware.
- Green Light
A flashing green light on the Brita filter indicates the unit is functioning correctly and has a significant remaining capacity. No maintenance is required at this stage.
- Yellow/Green Flashing
This transition signal indicates approximately 20 gallons of filtration capacity remain. We recommend purchasing a replacement cartridge promptly to avoid any interruption in service.
- Red Light
A flashing red light on the Brita filter signal confirms the 100-gallon limit is reached. You must replace the filter now to ensure effective contaminant removal.
How to Reset the Brita Faucet Filter Manually?
The indicator tracks usage automatically by sensing the water pressure through the cartridge. While a standard replacement triggers the reset, a Brita filter’s early replacement requires a specific manual sequence that many users overlook. If you install a new unit before the red light appears, you must perform a manual reset Brita procedure to recalibrate the sensor.
To execute a Brita filter reset, remove the existing cartridge and wait at least 30 seconds before inserting the new one. This 30-second interval is essential because the internal electronic counter requires a “power-down” period to clear the previous memory.
After the wait, insert Brita filter cartridge components until you hear the click; the system will recognize the new hardware and reset to green. If you do not wait the full 30 seconds, the filter indicator not working correctly is a common result, as the device will continue to display the previous usage level.
How to Use the Filter after Installation: Filtered vs Unfiltered Mode?
To effectively use Brita faucet filter systems, you must operate the integrated Brita faucet filter switch located on the right side of the unit to toggle between three distinct Brita filter handle positions. Draw the handle in front (toward the Brita logo) to switch on filtered water mode for drinking and cooking. Use cold water only with Brita to protect the internal membrane. Move the lever to the middle position for standard unfiltered water mode stream or push to the rear for unfiltered spray. These bypass settings are for washing dishes to prolong the 100-gallon filter life.
Common Brita Faucet Filter Problems after Installation (Quick Fixes)
Addressing common Brita faucet filter problems immediately after setup ensures long-term performance and prevents water waste. According to user data, most post-installation issues involve mechanical alignment rather than hardware failure. Use these quick fixes to resolve the four most frequent challenges encountered during the Brita faucet filter’s first step of operation.
- Filter Leaking from the Side
A Brita filter leaking from side gaps almost always indicates the filter cartridge was not fully seated during the insert Brita filter phase. To execute a Brita filter leaking fix, remove the cartridge and re-insert it by applying firm downward pressure; you must push until you hear a click to lock the internal seals.
- Filter Popping Off During Mode Switch
If the unit detaches when you move the Brita filter handle positions, the mounting collar is likely loose, or the internal rubber washer is misaligned. Re-tighten the collar by hand until snug; if the faucet filter wobbling persists, inspect the O-ring for physical cracks or mineral grit that prevents a flush connection.
- Significantly Low Water Flow
A sudden decrease in pressure during the filtered water mode typically signals that the 100-gallon capacity is reached or high mineral buildup is clogging the membrane. If the Brita filter indicator light is still green, the sediment in your local water supply may be exhausting the filter faster than the 360-litre average.
- Adapter Not Fitting the Spout
In an adapter not-fit scenario where neither provided part matches the internal threads, you likely have a non-standard faucet diameter. You can resolve this by calling 1-800-24-BRITA for a specialized attachment or purchasing a universal third-party brass Brita faucet adapter kit.
How to Change the Brita Faucet Filter Cartridge?
To learn how to change Brita faucet filter units, start by locating the Brita filter release button on the rear of the filter cup. Press this button firmly to disengage the internal locking mechanism and pull the old filter cartridge straight upward. You must wait at least 30 seconds before beginning the Brita filter cartridge replacement to allow the electronic Brita filter replacement indicator to reset its internal memory. To complete the replacement Brita filter process, insert the new cartridge by pushing down until you hear a clear click, then engage the 5-minute flush using only cold water.
Brita Faucet Filter vs. PUR Faucet Filter: Which Is Better?
In the Brita vs PUR faucet filter market, both brands represent the leading options for high-performance point-of-use filtration in the United States. A Brita filter comparison reveals that its carbon block technology removes 99% of lead and 60+ contaminants, offering a reliable 100-gallon filter life and tool-free installation. While a PUR faucet filter may be certified for a slightly higher number of specific substances, the decision on which faucet filter is best for your home depends on your specific local water quality report and required flow rate.
What Does the Brita Faucet Filter Actually Remove?
With activated carbon block technology the Brita faucet filter removes 99% of the lead and reduces chlorine taste and odor. This system is certified to remove specific Brita filter contaminants, such as benzene, asbestos, and trichloroethylene. Note the unit does not reduce fluoride from Brita filters, nor does it remove dissolved minerals, nitrates, and total dissolved solids (TDS); for such substances, you need an under-sink reverse osmosis (RO) system.
Why is my Brita faucet filter not fitting my faucet?
A Brita faucet filter not fitting usually means the sink is not a standard faucet with removable aerator threads. The system is incompatible with any Brita pull-out or pull-down models, spray-style heads or motion-sensor faucets. Attempting both included fixes. The Brita adapter is still not working, but your hardware has a nonstandard faucet adapter size. Having compatibility issues with Brita filters may require a third-party brass adapter kit or the switch to a Brita pitcher filter system.

